Awnings Boise ID are a cost-effective way to improve your home’s energy efficiency and add style. They reduce solar heat gain and can help you save on air conditioning bills.
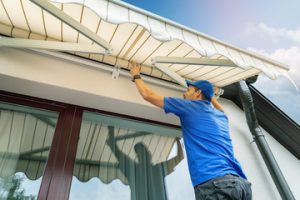
They are made of water-resistant fabric or aluminium and extend from a wall to shade and protect outdoor spaces. They are available in various designs, colors and fabrics and can be permanent or retractable.
Awnings not only add aesthetic appeal to a home, but they also enhance functionality. They help reduce solar heat gain, which in turn lowers air conditioning costs during warmer months. Additionally, they protect interior furniture and fabrics from sun fading. These factors are important when determining a home’s value, especially in today’s eco-conscious world.
Homebuyers want more than square footage when they shop for a new property, and the addition of an awning can increase your home’s market value. It can turn unused outdoor spaces into usable entertainment areas that potential buyers can envision relaxing and entertaining in for years to come.
If you are looking for a cost-effective way to increase your home’s value, consider adding a retractable awning. This feature is not only functional, but it can boost curb appeal, and can be customized to fit any style of home. You can even choose from a wide variety of colors and designs, which means that you can find one that complements your home’s decor.
The versatility of awnings makes them an appealing choice for today’s buyers. They can be extended when desired and retracted when not in use, making them an ideal option for areas with varying weather conditions. In addition, they are available with a range of features, such as motorized controls and automatic sensors, that can provide an extra layer of convenience.
Retractable awnings are also an energy-efficient feature, which can boost a property’s value even more. They prevent sunlight from passing through windows and doors, which can raise indoor temperatures during the summer. This reduces reliance on the air conditioner and lowers energy bills, which is an important factor in calculating a home’s value.
The material used in the construction of awnings can impact durability and appearance, as well as maintenance requirements. Popular fabric materials include acrylic, polyester, and canvas. These options are available in a range of colors and patterns, and many have warranties that can add to a property’s value when it comes time to sell. The frame of a retractable awning can also affect its durability and appearance, and can be made from aluminum, steel, or wood.
They Reduce Solar Heat Gain
Awnings are more than just aesthetic enhancements — they help lower energy costs by shading windows and regulating indoor temperatures. When strategically placed, awnings reduce solar heat gain on south- and west-facing windows or patio doors, preventing the buildup of intense sunlight that can cause interior overheating. Awnings can also cut down on excessive sunlight through glass and the resulting energy use, reducing reliance on air conditioning and electricity bills.
Awning fabrics — particularly those that are light-colored and tightly woven — reflect sun rays rather than absorb them, increasing shading efficiency and energy savings. In addition, they can block harmful UV rays that fade furniture, flooring, and window treatments over time, further protecting the integrity of interior furnishings and extending their lifespan. Automated retractable awnings, when equipped with sensors that monitor and adjust the awning’s position based on sun exposure, can further enhance energy efficiency by automatically reversing and redeploying them in accordance with sunlight intensity.
In wintertime, a retractable awning lets in passive solar warmth, further lowering energy consumption by reducing the need to turn on your heating system. However, if you prefer to keep your awnings retracted, you can still reap the benefits of the sun’s free radiant heat by installing a thermal barrier, like a foam insulation board, between your home and its window or door frames.
Awnings are a smart addition to any eco-conscious homeowner’s renovation plan, but not all awnings are created equal. It’s important to choose a quality, durable textile that resists damage and UV degradation to get the most out of this valuable home investment. For optimal performance, a retractable awning is the best option since it can be fully or partially retracted during cooler seasons and extended when solar heat gain causes overheating or increased air conditioning usage. When combined with other climate-friendly upgrades like low-E windows and solar panels, awnings can provide real energy conservation without sacrificing comfort or style. Schedule a free consultation today to see how an awning can transform your space.
They Enhance the Aesthetics of Your Home
When your awnings are in good condition, they make a significant visual impact. They can elevate a sleek, modern home and make it look even more impressive, or they can enhance the look of a classic or Mediterranean-style house. There’s also a wide range of awning colors, which allows you to choose shades that complement your home’s exterior color palette without clashing.
Awnings come in various shapes and materials, which also impact their appearance and functionality. For example, metal awnings are typically more durable than canvas options, and they offer a sleeker, more refined aesthetic that complements contemporary homes. They also require less maintenance than traditional awnings, which can help save you money in the long run.
Moreover, the awnings help to reduce your cooling bills by blocking out sunlight and heat that would otherwise enter the home. This is a significant benefit in the summer, when temperatures can be uncomfortably high and you may spend more on cooling. In the winter, you can retract your awnings to allow sunlight inside to warm the home.
In addition, the awnings can protect your interior furniture and other elements from prolonged sun exposure, which helps to extend their lifespan. This is especially important in New Jersey, where the climate can be humid and rainy. This helps to preserve the value of your furnishings and ensures that they remain attractive for a longer period of time, which is appealing to potential buyers.
Awnings are a relatively inexpensive home improvement option, yet they can significantly boost your property’s resale value. They create a visually appealing outdoor space, support energy savings, and expand the living area of your home, making them desirable features for prospective buyers. Moreover, the awnings can add curb appeal to your home and complement its design, making it stand out in the real estate market. However, it’s important to keep in mind that not all upgrades return the same resale value. Therefore, it’s vital to choose a home improvement project that you can afford and that will be an asset in the future.
They Protect Your Home from Water
Awnings protect brick-and-mortar buildings from water damage by rerouting rainwater and preventing it from flowing directly over the foundation. This prevents puddles from forming and provides a safe environment for pedestrians walking by. It also prevents water from pooling near the entrance, which can be an inconvenience for guests and residents and may cause leaks in the building’s interior.
In addition to protecting the building from water damage, awnings create a comfortable environment for outdoor living. They shield homes from the harsh summer sun and heavy rain showers, allowing people to enjoy their patios or porches without being exposed to uncomfortable weather conditions.
Additionally, the awnings help to keep furniture, carpets, and other furnishings indoors from fading or becoming damaged due to direct sunlight exposure. This can have a positive impact on a home’s interior design, and it is one of the many ways in which awnings can increase a home’s value.
Awnings come in a variety of styles to suit the architectural design and aesthetics of different properties. They are usually made of some type of fabric (cotton, polyester, or acrylic) stretched over a framing that can be aluminum, steel, or wood. The fabrics and frames can be customized to match the colors and materials of the exterior and interior spaces.
A good quality awning can last for years and offers a wide range of color and stripe options, along with durable, fade-resistant fabric. Some awnings feature a vinyl coating, which helps to repel rain and maintain the brightness of the awning. Others have a scupper or downspout leader, which is a vertical pipe that can be used to direct water away from specific areas on the awning.
Installing high-quality awnings can enhance the curb appeal of a property, increasing its market value. They are designed with durable, weather-resistant materials and require only occasional cleaning with mild soap or detergent and water to remain in good condition. In addition, the simple cleaning process makes them an attractive feature for potential buyers when the time comes to sell the property. Moreover, the energy savings that awnings provide can boost the resale value of a home even more.
Visit our Professional Services Blogs
Chris Atkins Lawncare, Atticus Landscaping, Treasure Coast Pressure Wash, Gulf Beach Plumbing, Marlborough Plumbing, Guns And Hoses Pressure Washing, Ambrose Construction, Coral Gables Pressure Washing, Willco Photography, Roofing Akron, Danalogsdon Roofing El Cajon, EC Siding Roofing Windows, Aurora Gutter, American Insurance Source, ECO, etdn, Denison Service League, Roofing Blog, Atlantic Vinyl Windows, Brookshires Fireplaces, JD Advanced Remodeling, Product Judgment, Master Dry Foundation Repair, Moe’s Hip, Elta Patio Paramount, Rock Around The Clock Festival, Learn, Play, Beyond, MoralesT Gardening, Car Window Tinting Perth, Duncan Carpentry, Gatestone Lighting, Mid Missouri Mold Inspections, Stucco Repair Albuquerque, Wausau Siding Hire, Munster Tree Care, Blue Granite Homes, Custom House, CENTRAL OS, Atlanta Pavers, Phillips Law Firm, Brent Ryder Masonry, Walker Construction Drywall Division, RJ Law, Caledon Plumbing, DDS Tech USA, Maine Mortgage Services, Inckpen, Seasons at Rose Creek, Cottonwood Place Dental, Cosmetic Laser 2000