A roof quietly protects a home every single day, yet many homeowners rarely think about it until a serious problem appears. One day, everything may seem perfectly fine, and the next, water stains begin spreading across the ceiling after a storm. Missing shingles, sagging areas, and rising energy bills often arrive as warning signs that the roof is no longer performing the way it should. For many homeowners, these issues lead to one important question: is it finally time for a roofing replacement?
Replacing a roof is one of the biggest home improvement decisions a homeowner can make. It affects safety, comfort, energy efficiency, property value, and long term maintenance costs. While repairs can solve minor problems, there comes a point when replacing the entire roof becomes the smarter and more cost effective option. Understanding the signs of roof deterioration, the replacement process, and the available roofing materials can help homeowners make informed decisions while protecting their homes for years to come. Visit Website for more information.
Why Roofing Replacement Is Important
A roof does much more than simply cover a house. It acts as the home’s first layer of protection against rain, sunlight, wind, humidity, and changing temperatures. Over time, constant exposure to weather conditions gradually weakens roofing materials and reduces their ability to protect the property effectively.
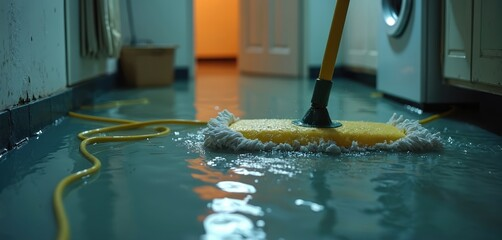
An aging or damaged roof can lead to serious structural problems if ignored for too long. Water leaks may damage ceilings, walls, insulation, and electrical systems. Moisture trapped inside the home can also encourage mold growth, which may affect indoor air quality and create health concerns for occupants.
Roofing replacement also improves energy efficiency. Older roofing materials often lose their insulating performance over time, causing heating and cooling systems to work harder. Replacing the roof with newer materials can help regulate indoor temperatures more effectively and reduce energy costs.
Another major reason homeowners consider roof replacement is property value. A new roof improves curb appeal and gives potential buyers confidence that the home has been properly maintained. In many cases, a roof replacement becomes a worthwhile long term investment rather than just a repair expense.
Common Signs That a Roof Needs Replacement
Many roofing problems begin gradually, which makes them easy to overlook in the early stages. Homeowners who recognize warning signs early may avoid more severe structural damage and costly repairs later.
One of the most obvious signs is missing or damaged shingles. Shingles that crack, curl, or loosen from the roof surface indicate that the material is deteriorating. If large sections of shingles are missing after storms or strong winds, the roof may no longer provide reliable protection.
Water leaks are another major warning sign. Stains on ceilings or walls often indicate moisture entering through damaged roofing materials or weakened flashing around vents and chimneys. Even small leaks can eventually lead to significant structural issues if left untreated.
Sagging rooflines should never be ignored because they may indicate underlying structural damage or moisture problems affecting the roof deck. Excessive moss or algae growth can also suggest trapped moisture that weakens roofing materials over time.
Granules collecting in gutters are another common sign of aging asphalt shingles. As shingles wear down, they lose the protective granules that shield them from sunlight and weather exposure.
In some cases, rising energy bills may point to roofing problems as well. Poor roof insulation or ventilation can allow heat to escape during colder seasons and trap excessive heat during warmer months.
Roof Repair Versus Full Replacement
One of the most common questions homeowners ask is whether their roof needs repairs or a complete replacement. The answer depends on the severity of the damage, the age of the roof, and the overall condition of the roofing system.
Minor problems such as a few damaged shingles or isolated leaks may often be repaired successfully. Timely repairs can extend the life of the roof and prevent further deterioration when the damage is limited.
However, repeated repairs may become less practical as the roof continues aging. If leaks keep returning, large sections of roofing are damaged, or structural issues are developing underneath the surface, replacement may be the better long term solution.
Age is another important factor. Most roofing materials have expected lifespans, and once a roof approaches the end of that period, repairs may only provide temporary relief. Investing in a new roof can sometimes save homeowners money by reducing ongoing repair costs and improving energy efficiency.
Professional inspections are valuable because they help determine whether the roof still has enough structural integrity to justify repairs or if full replacement is necessary.
Popular Roofing Materials for Replacement
Choosing the right roofing material is one of the most important parts of the replacement process. Different materials offer varying levels of durability, appearance, maintenance, and energy efficiency.
Asphalt shingles remain one of the most popular choices because they are affordable and available in many styles and colors. They provide reliable protection for many residential properties and are relatively easy to repair when damaged.
Metal roofing has gained popularity because of its long lifespan and resistance to harsh weather conditions. Metal roofs are also known for reflecting heat, which may improve energy efficiency during warmer seasons.
Tile roofing offers a distinctive appearance and excellent durability. Clay and concrete tiles can last for decades when properly maintained, although they are heavier and may require stronger structural support.
Wood shingles and shakes provide natural beauty and rustic charm. However, they usually require more maintenance and protection against moisture and insects.
Slate roofing is often considered a premium option because of its elegant appearance and remarkable longevity. Although it is one of the more expensive roofing materials, slate can last for many decades with proper care.
Selecting the right material depends on budget, climate, maintenance preferences, and the desired appearance of the home.
What Happens During a Roof Replacement?
Many homeowners feel nervous about the roofing replacement process because they are unsure what to expect. Understanding the basic steps involved can help reduce stress and improve preparation.
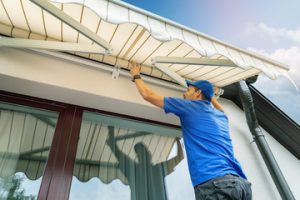
The process usually begins with a detailed roof inspection to evaluate the condition of the existing materials and underlying structure. Measurements are taken, and homeowners choose the replacement material that best fits their needs.
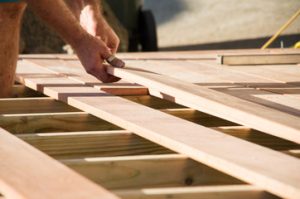
During installation, old roofing materials are removed so the roof deck underneath can be inspected for hidden damage. Any weakened or rotted sections are repaired before the new roofing system is installed.
Protective layers such as underlayment and flashing are then added to help prevent water intrusion. The chosen roofing material is installed carefully to ensure proper alignment, sealing, and ventilation.
The replacement timeline varies depending on the size of the roof, weather conditions, and material type. Some projects may be completed quickly, while larger or more complex roofs require additional time.
Cleanup is also an important part of the process. Roofing crews remove old materials, nails, and debris to restore the property once installation is complete.
How Weather Affects Roofing Lifespan
Weather conditions play a major role in how long a roof lasts before replacement becomes necessary. Constant exposure to sunlight, rain, humidity, wind, and temperature changes gradually weakens roofing materials over time.
Strong winds may loosen shingles or expose vulnerable areas of the roof. Heavy rain can increase moisture damage, especially if drainage systems are clogged or damaged. Prolonged exposure to sunlight may cause certain materials to dry out, crack, or lose flexibility.
Temperature fluctuations also affect roofing systems. Expansion and contraction caused by changing weather conditions can weaken seals and create small openings where moisture enters.
Homes located in areas with severe storms or frequent weather changes may require more frequent inspections and earlier roof replacement compared to properties exposed to milder conditions.
Regular maintenance helps reduce weather related damage and may extend the lifespan of the roofing system significantly.
The Importance of Roof Ventilation and Insulation
Many homeowners focus only on the outer roofing materials, but ventilation and insulation are equally important parts of a healthy roofing system. Poor ventilation can trap heat and moisture inside the attic, which accelerates roof deterioration and reduces energy efficiency.
Excess moisture inside attic spaces may lead to mold growth, wood rot, and weakened structural components. During warmer months, trapped heat can increase indoor temperatures and force cooling systems to work harder.
Proper ventilation allows air to circulate through the attic, helping regulate temperature and moisture levels. Insulation also helps reduce heat transfer between the roof and living spaces.
When replacing a roof, improving ventilation and insulation can enhance the overall performance of the entire home while extending the lifespan of the new roofing materials.
How Regular Maintenance Delays Roof Replacement
Although every roof eventually reaches the point where replacement becomes necessary, regular maintenance can help extend its lifespan considerably. Many roofing problems worsen because small issues are ignored until they become major structural concerns.
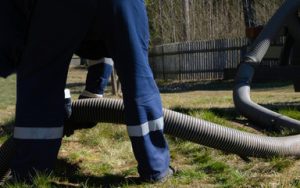
Routine inspections help identify damaged shingles, leaks, clogged gutters, and flashing problems early. Cleaning debris from the roof and gutters also improves drainage and reduces moisture buildup.
Tree branches hanging over the roof should be trimmed to reduce debris accumulation and prevent storm damage. Moss and algae growth should also be removed because trapped moisture weakens roofing materials over time.
Homeowners who schedule regular roof inspections and maintenance often experience fewer unexpected repairs and longer lasting roofing performance.
Final Thoughts
Roofing replacement is one of the most important investments homeowners can make to protect their property and maintain long term comfort. A strong and reliable roof safeguards the home from weather damage, improves energy efficiency, and enhances overall property value.
Recognizing early warning signs such as leaks, damaged shingles, sagging areas, and rising energy costs can help homeowners address roofing problems before they become severe. While minor issues may sometimes be repaired, aging or extensively damaged roofs often require complete replacement for long term protection.
Choosing the right roofing material, maintaining proper ventilation, and performing routine inspections all contribute to a healthier and longer lasting roof. With careful planning and proper maintenance, homeowners can enjoy greater peace of mind knowing their home remains protected for many years to come.